Night Sky Photography for Beginners

Written by
Navid Baraty
Photographer
December 10, 2021
Photographing the endless wonders of the night sky is a highly rewarding experience that gives you a deeper connection to the universe. Though many modern smartphones have night-sky photography modes, a full-blown DSLR camera offers better clarity and the ability to bring out much greater detail than the human eye can see. Here are a few tips to help you get started.
How to take pictures of space You can take spectacular space images with your DSLR camera. We're going to show you how to get breathtaking photos of the Moon, star trails, and the Milky Way galaxy.Video: The Planetary Society
Before the Shoot
Timing and planning are as important for astrophotography as they are for everyday photography. Scout your shoot location ahead of time to get a sense of the layout and visualize your compositions. Consider including interesting features of the landscape in the foreground of your image to help tell a story and convey a sense of place. Familiarize yourself with the night sky using apps and other resources. Know the moonrise time in your location, as well as when the objects you’re interested, such as the Milky Way, will rise and the direction they will travel overhead. PhotoPills is a fantastic photography app to use for planning.
Light pollution is an important consideration when selecting a shoot location. Get as far away from city lights as possible, and if possible, go to higher elevations where there are less particles in the air to scatter light. This will make your images clearer and more detailed. Shooting in colder temperatures will give you cleaner images due to your camera’s sensor heating less during long exposures and generating less noise.
Basic Equipment
You don’t need lots of expensive gear to take beautiful images of the night sky. These four items are enough to get you started:
- A camera with manual-mode functionality. Manually controlling the ISO, aperture, and shutter speed is very important. For best results, use a full-frame camera, which will have a larger sensor to capture more light. Full-frame cameras also generate less noise at higher ISO settings.
- A tripod sturdy enough for shooting long exposures in windy conditions. A ball-head mount on your tripod is much easier to use in the dark than a standard tripod mount.
- If you’re photographing the Milky Way, you’ll want a wide-angle lens with a wide aperture (f/2.8 or lower if possible).
- A shutter-release cable to help minimize any potential camera shake and enable you to shoot exposures longer than 30 seconds.
Photographing the Moon
The Moon is a great starting point for night sky photography because of its brightness. This brightness varies as the Moon goes through its phases. The fuller the Moon is, the less exposure time is needed. And as parts of the Moon pass into shadow, you get more definition on the craters on its surface. All of these differences make for an interesting variety of photographing experiences.
Before photographing the Moon, decide on when and where you want to shoot it. For extra-sharp detail, wait until the Moon is at its highest point in the sky. For location, avoid ambient light from street lights and traffic. This may mean going off on a remote road or into a public park after hours, or at the very least turning off as many lights as you can.
For the best Moon photos, use telephoto lenses with at least a 200mm focal length, and zoom in as far as you can. Set the ISO to 100 or lower, and the aperture to f/11 to f/16, depending on your lens. You’ll want to play around with these settings a bit to find which ones work best for your camera. You’ll also want to adjust them depending on the Moon phase. When the Moon is less full, you’ll want to use narrower aperture values and higher ISO. Set your shutter speed to 1/60th to 1/125th, and again you can play around with this to find what works best. Manually focus on the Moon or set the focus to infinity, and click!
Photographing the Milky Way
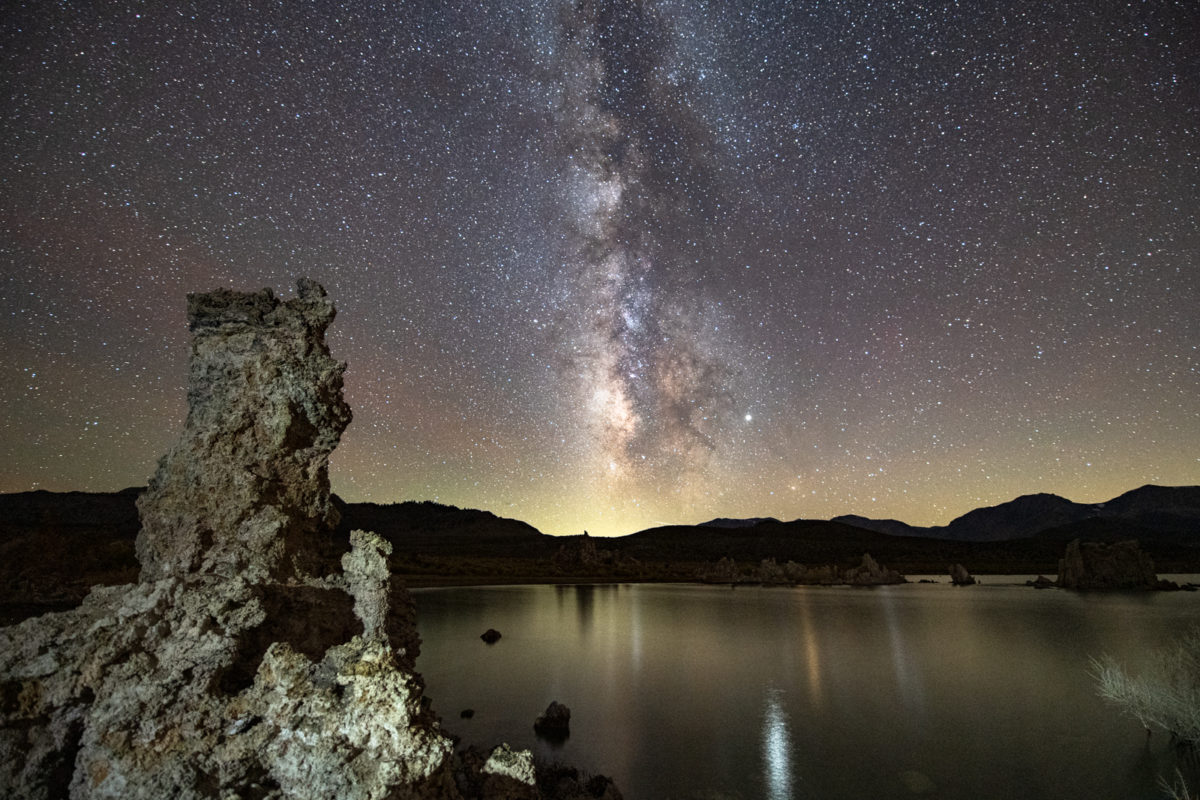
There’s nothing more incredible than seeing the grandeur of the Milky Way from a dark location. The Milky Way is best photographed during a new Moon—or up to one week before or after—as the Moon’s brightness will wash out the Milky Way.
When photographing the night sky, you need to account for the Earth’s rotation. You can only expose your image for a short time before the stars are no longer pinpoints and begin to trail in your image. Since you’re trying to capture as much light from the sky as possible, it’s important to use a wide-angle lens that has a large maximum aperture (f/2.8 or lower). A 14-24mm wide-angle zoom lens ideal to use on a full-frame camera, or a 10-20mm lens on a crop-sensor camera.
To calculate how long your exposure can be before star trails appear, use the 500 Rule:
Full-frame cameras:
Maximum Exposure Time (in seconds) = 500 / Focal Length
Crop-sensor cameras:
Maximum Exposure Time (in seconds) = 500 / (Focal Length x 1.5)
For example, if you’re shooting at 14mm on a full-frame camera, the maximum exposure time would be 500/14, or around 35 seconds.
Just remember that the 500 Rule is a rule of thumb and should serve only as a starting point. You’ll need to experiment and adjust your exposure times accordingly. As you become more familiar with photographing the night sky, you won’t even need to reference it.
Switch your wide-angle lens to manual focus and focus to infinity. You can then shoot at values in the following ranges to produce consistently great results:
Aperture: f/2 - 2.8
Exposure: 10 - 30 seconds
ISO: 1600 - 6400
Color balance: 4000 - 5000K (Daylight / Auto)
Try different settings in these ranges to find a combination that works best for your particular camera setup.
Capturing Star Trails
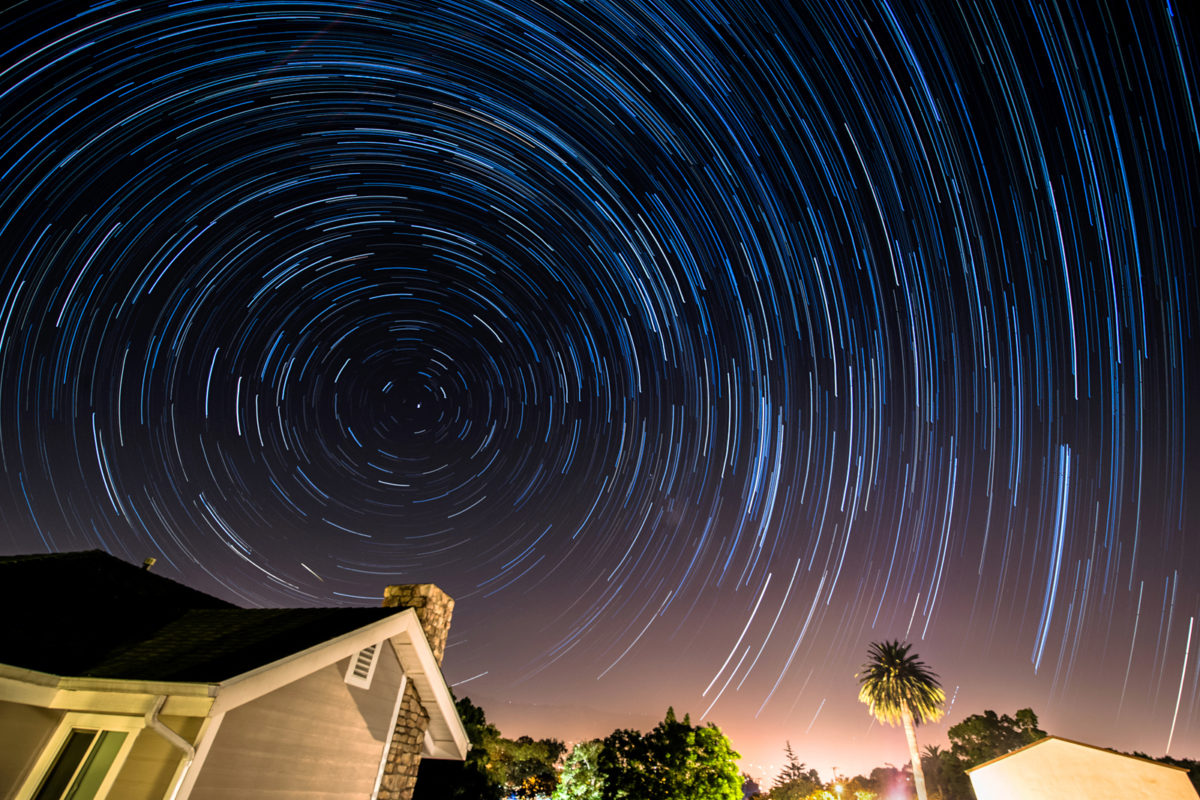
We do everything possible to avoid star trails when shooting the Milky Way, but sometimes the trails are exactly what we aim to capture. Long exposures of star trails create gorgeous images of the night sky that depict the passage of time.
In the northern hemisphere, all of the stars in the night sky appear to revolve around the North Star, or Polaris. If you shoot a long exposure with your camera pointed at Polaris, you’ll notice that all of the stars circle around it. Use Polaris as your guide when choosing a direction to shoot. The two outermost stars in the bowl of the Big Dipper point to Polaris.
You have two options when shooting long exposures of star trails. You can either take a single long-exposure photograph using a very low ISO, or you can take a sequence of images that can be stacked in software like StarStax. For example, instead of a single 60-minute exposure, you can shoot 120 images of 30-second exposures taken consecutively.
Stacking exposures is the recommended method. First of all, the longer your exposure is, the more your camera sensor heats and generates noise in your image. Secondly, the stacking method makes it possible to photograph star trails in light-polluted areas. Even if you’re in a bright city, you could shoot 1,000 images of two or three-second exposures and still capture star trails. Finally, many different factors could ruin a single long-exposure, such as a dead battery, tripod shake, or an unexpected light source entering the frame.
While a wide-angle lens is best for the Milky Way, you can use a lens of any focal length to photograph star trails. Note that the wider the lens is, the longer you’ll have to wait for star trails to fill your frame. If you remember the 500 Rule example from before, you need to wait around 35 seconds for star trails to appear with a 14mm lens on a full-frame camera. Using an 85mm lens instead, you only need to wait 500/85, or about 5 seconds.
Using a longer focal length is your best choice if you want longer star trails to appear over a shorter period of time. Use the widest aperture setting on your lens so you can shoot at the lowest possible ISO when exposing your image. Always remember that a higher ISO means more noise.
Place your camera in continuous shooting mode and set the shutter speed to your desired exposure time. By locking the shutter button down on your shutter-release cable, your camera will take consecutive images as each exposure ends until you stop it. Alternatively, you can use the built-in intervalometer on your camera (if it has one) to set the desired parameters.
Don’t forget to bring extra batteries! Long exposures and cold nights will quickly drain their life.
Happy Shooting
Photographing the night sky is a blank canvas of possibilities for a photographer. It will take a lot of experimentation to discover which settings work best for you. In the process, you’ll gain a deeper understanding and fascination for the cosmos.
You can find more of Navid Baraty's photography work on his Instagram, @navidbaraty
Support our core enterprises
Your gift today will go far to help us close out the year strong and keep up our momentum in 2026.
Donate

 Explore Worlds
 Find Life
 Defend Earth