
 Explore Worlds
 Find Life
 Defend Earth


A little fun with Deep Impact deep-sky data
Written by
Emily Lakdawalla
November 14, 2011
A couple of weeks ago I posted about some neat new Deep Impact images of deep-sky objects. The imaging was done as an "operational training exercise," which implies that there is more to come. And last week, the team put all of the data from Deep Impact's deep-sky imaging session online, and challenged visitors to see what they could make from it. They promised to post any submissions from the public to their website.
I have been wanting to get back to some pretty-picture making after spending last week on the unhappy task of trying to figure out what was going on with Phobos-Grunt, so this was a perfect opportunity. Here's what I managed to make after an hour or two of fiddling. More work is clearly needed, but I think now that I've got a good understanding of these data sets, so I can share what I've learned with you all and hopefully you can go out and make something lovely of these images!
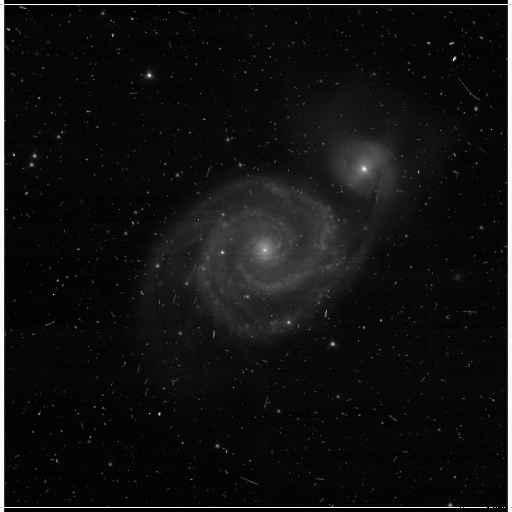
Deep Impact looked at three different deep-sky targets: M51 (the Whirlpool Galaxy), M27 (the Dumbbell Nebula), and NGC 6960 (the Veil Nebula). The Veil images are, I think, the prettiest, but the M51 images seemed to be the easiest to work with because the spiraling arms of the galaxy are pretty easy to spot, compared to the faint wisps of the Veil Nebula. So I started with those. Here's the best black-and-white image I managed to come up with:

Color proved quite a bit harder. This image is posted as kind of a work in progress, except that I really don't have time to work on it more; I'm hoping other people can do better with these data.

The color image is badly affected by cosmic ray hits, but you can see that it compares rather nicely with the colors visible in the Hubble photo of M51:

NASA, ESA, S. Beckwith (STScI), and The Hubble Heritage Team (STScI/AURA)
M51, the Whirlpool Galaxy
This most detailed-ever image of the Whirlpool Galaxy was taken in January 2005 with the Advanced Camera for Surveys on the Hubble Space Telescope.It may also be interesting to compare to this very nice amateur astrophotographer's photo. One thing I noticed while comparing the Deep Impact images to the Hubble and amateur photos is that the Deep Impact data are mirror-reversed; you need to mirror-flip them to make them the correct orientation.
So here's what the data set looks like, and what its pitfalls are, and some ideas for what people might do with it.
What are the Deep Impact photos of?
They are M51 (the Whirlpool Galaxy), M27 (the Dumbbell Nebula), and NGC 6960 (the Veil Nebula).
What are the 65 images of each target?
Like most deep-space cameras, Deep Impact's camera has a filter wheel, so to get color data, it has to take series of photos through each of several filters. All three targets were shot through five different color filters:
- Filter 1 is a broadband clear filter -- just a clear silica glass window letting all light in to the detector. Its central wavelength is 650 nanometers.
- Filters 4 and 5 are medium-band color filters centered on 750 and 950 nanometers. Filter 4 passes light from 700 to 800 nanometers, and filter 5 lets in light from 900 nanometers all the way up to the limit of the detector at roughly 1000 nanometers (technically speaking, it is a long-pass filter). These two are called "red" and "infrared" but really both of them are in what you'd ordinarily call the near-infrared part of the spectrum.
- Filters 2 and 7 are extremely narrow-band filters designed to look for very specific molecules. Filter 2 is at 514 nanometers (roughly in the green part of the spectrum), where C2 has an emission line. Filter 7 is at 387 nanometers (on the violet end of the spectrum), where CN has an emission line.
For each of these filters, Deep Impact took four to seven photos of each target at each of several different exposure times, ranging from 0.3 to 1020 seconds. There is more information about the filters at the bottom of this page on the Deep Impact website.
What format is the data in?
It is in FITS format. This file format is commonly used by astrophotographers because it is friendly to images that contain an extreme range of contrast, from the faintest of nebulae to the brightest of stars. You can open, adjust the contrast, and convert these images to more common image formats using free software called FITS Liberator, developed by ESA, the European Southern Observatory, and NASA. Or you can do what I did, which was to use Björn Jónsson's IMG2PNG to batch-convert all the files. I do think that it would be better to use the FITS Liberator, though, because it allows you to do logarithmic stretches to improve the detail visible in fainter parts of the image. I didn't do that because it's much faster to use IMG2PNG, which can process all of the photos at once.
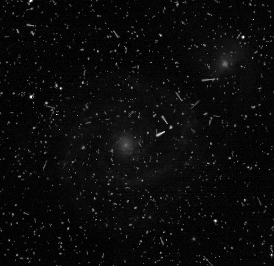
I downloaded and converted all the images to PNG format and started checking them out. My first impression was that the images are nice but they are plagued by cosmic ray hits. Here, for example, is an animation made of six clear-filter images. You can see that the galaxy at the center nearly stays put (there is a slight drift, which I assume is caused by the spacecraft staying pointed in the same location for six consecutive five-minute exposures). But there is this sparkling snowstorm of dots and long scratches made by cosmic rays streaking into the detector over the long exposures.
How to cope with that? One approach is to stack images. If you take several separate long exposures, as Deep Impact did, you can add them all together. The signal in the image -- the galaxies and stars -- will add together. But cosmic rays' locations are random, so odds are good that wherever a pixel contains a cosmic ray in one image, there won't be anything in the other five except space or stars. That's how I made the top image, by aligning and stacking the six exposures in Photoshop.
There are other ways to remove cosmic ray hits. Because they have such sharp edges, filters that are designed to remove dust and scratches from photos often do a good job of removing those dots and streaks, though they also tend to remove detail from the thing you're imaging; in this case it may remove some of the stars. Another trick requires a lot more work, but for these data it might be worth it: align all the images on separate layers in Photoshop. Break out the eraser tool, and, starting on the topmost image in the layer, run the eraser over anything that looks like a cosmic ray hit. It'll make a hole in that layer, allowing the next layer will show through. Odds are, there's no cosmic ray hit in the next layer in the same location. But if there is, you can erase the hit from that layer, exposing that part of the image on the third layer in the stack. With six images, you'll wind up with individual layers that look like Swiss cheese, but the end result should be super clean.
Except for a few pixels. Another thing I noticed while inspecting the data is that there is a good-sized number of "hot" pixels on the camera detector -- isolated pixels that are much brighter than they ought to be. You can pick these out very easily in the animation, because they are the bright spots that do not move while everything around them is moving. Here's a little cropped and enlarged bit of that animation. The stars are fuzzy dots shifting slowly to the left; the cosmic rays are the snow of spots and streaks; but there are also three quite bright, stationary, hot pixels in this part of the frame, and if you stare long enough you will notice many more than just the most obvious three. Because the hot pixels are in pretty much the same location on every layer, it may take more care, and possibly even a little judicious use of the clone stamp tool, to get rid of them.
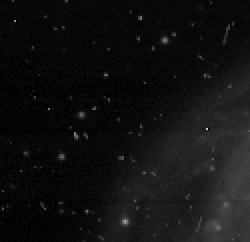
Unfortunately, the cosmic ray problem gets much worse with the color-filter images. Here's why. Remember that the filters only allow a certain range of wavelengths of light to pass through to the detector. All other wavelengths don't pass through. Therefore, fewer photons -- less light -- hit the detector when you're using a color filter than when you're using a clear filter. In order to get a picture that is as bright as a clear-filter image, you have to do a much longer exposure. And all that time that the detector is accumulating charge from photons, it's also being hit by the same continuous rain of cosmic rays. The longer the exposure, the more cosmic ray hits. So the problem is worst where the smallest number of photons passes through the filter. For these observations, those C2 and CN filters' images are overwhelmed by cosmic ray hits. Here's the galaxy as seen through the C2 filter:
The cosmic ray problem is the reason I didn't produce any particularly good color composites from these data. But that doesn't mean it isn't worth trying, and I hope to see some of you make an attempt. Let me know what you make!
Protect Our Shared Future
You help us defend humanity and prevent asteroid impacts. Donate now to become a Planetary Defender!
Donate