
 Explore Worlds
 Find Life
 Defend Earth


Putting the Rhea puzzle together
Written by
Emily Lakdawalla
September 4, 2007
Well, I had intended to spend today preparing a post on the upcoming Iapetus flyby, but I got sidetracked because of an absolutely beautiful set of images that Cassini returned from the Rhea flyby that happened on August 30. During the encounter, Cassini's narrow-angle camera snapped 11 pictures of Rhea in a crescent phase, the ingredients for a 5,000-pixel-wide mosaic on the moon. How could I resist putting such a puzzle together?
Here are the images I started out with. (If you'd like to try this at home, here are links to the raw image files from the Cassini raw images website: N00090967 - N00090969 - N00090971 - N00090973 - N00090975 - N00090977 - N00090978 - N00090979 - N00090980 - N00090981 - N00090982) During the time that these images were taken, Cassini traveled about 10,000 kilometers, beginning at a range of 63,657 kilometers and ending at a range of 53,827 kilometers.

NASA / JPL / SSI
Eleven raw images of Rhea's crescent
NASA / JPL / SSI
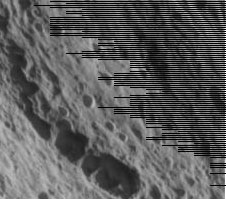
Every-other-line truncation
The every-other-line truncation in some Cassini images happens when the images are compressed using the onboard "LOSSLESS" compression scheme (which is obviously a bit of a misnomer, since it can and does lose spatial information). The algorithm is a variant of a Huffman encoder. It operates on pairs of lines and guarantees that the compressed image will be no more than half the size of the original image. If the encoder figures out that the two lines it is processing will be compressed more poorly than a 2:1 ratio, the encoder simply stops and truncates the rest of the second line. In an absolute worst-case scenario, the entire second line could be truncated. The algorithm was chosen because it is computationally inexpensive and because it is easy to predict how much space (no more than half the original image size) the compressed frames will take up on Cassini's solid-state recorders.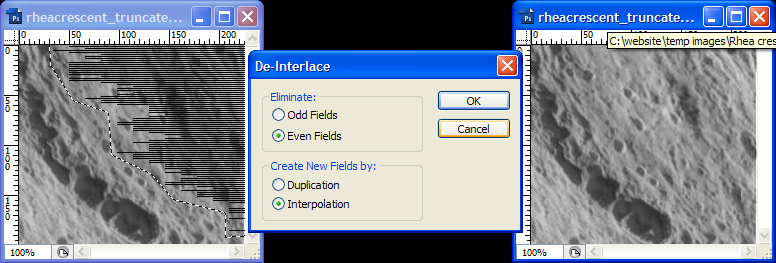
NASA / JPL / SSI / Emily Lakdawalla
De-Interlacing a Cassini image with every-other-line truncation
The De-Interlace filter in Photoshop can repair Cassini images that are affected by every-other-line truncation.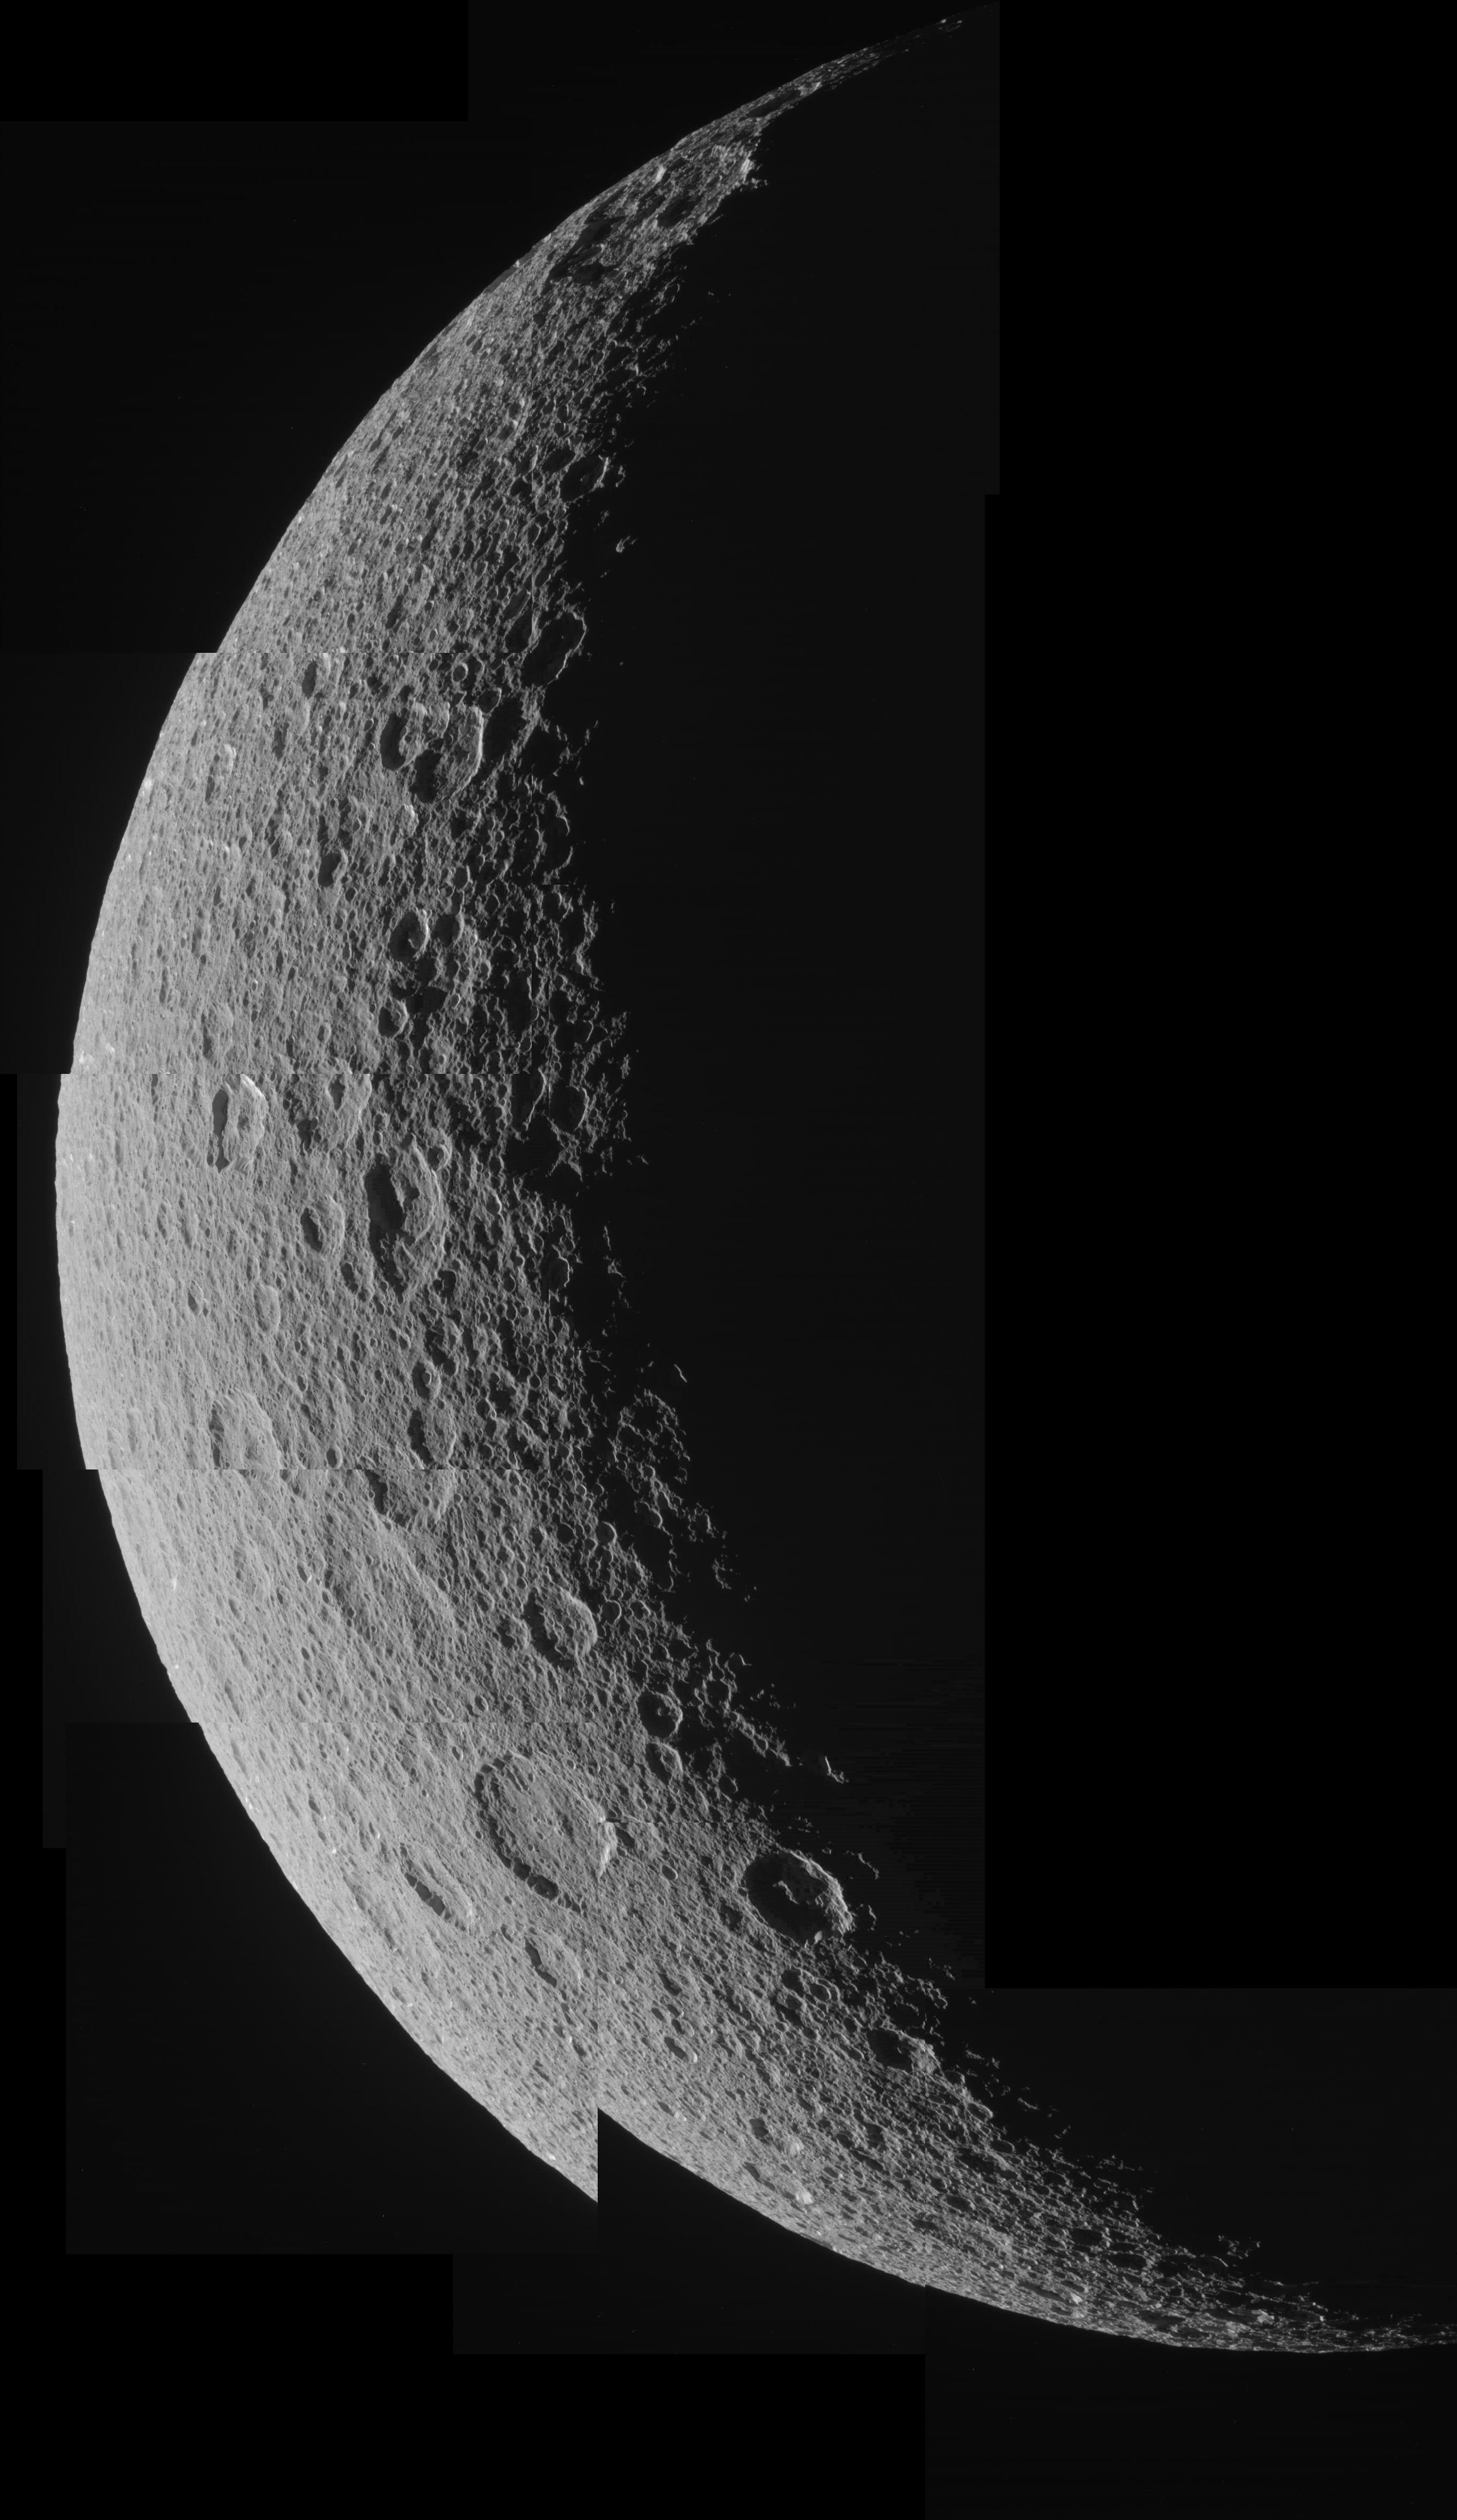
Assembling the Rhea crescent mosaic
What you have to do is to resize each of the frames a little bit, stretching them, and, for the ones at the bottom edge, rotating them a bit to get them to line up. In Photoshop, just press Control-T (or go to Image > Transform) and you'll get some handles on each layer to stretch and rotate it with. Here's what I get after that step:

Assembling the Rhea crescent mosaic
Not quite pretty enough, though. There is still a small amount of mismatch between tile edges. You can make that less obvious by feathering the edges of each frame. I do this by using the Eraser tool with a large soft paintbrush on each frame, only touching up the areas where each frame overlaps one below it. Here's what I get after that step:
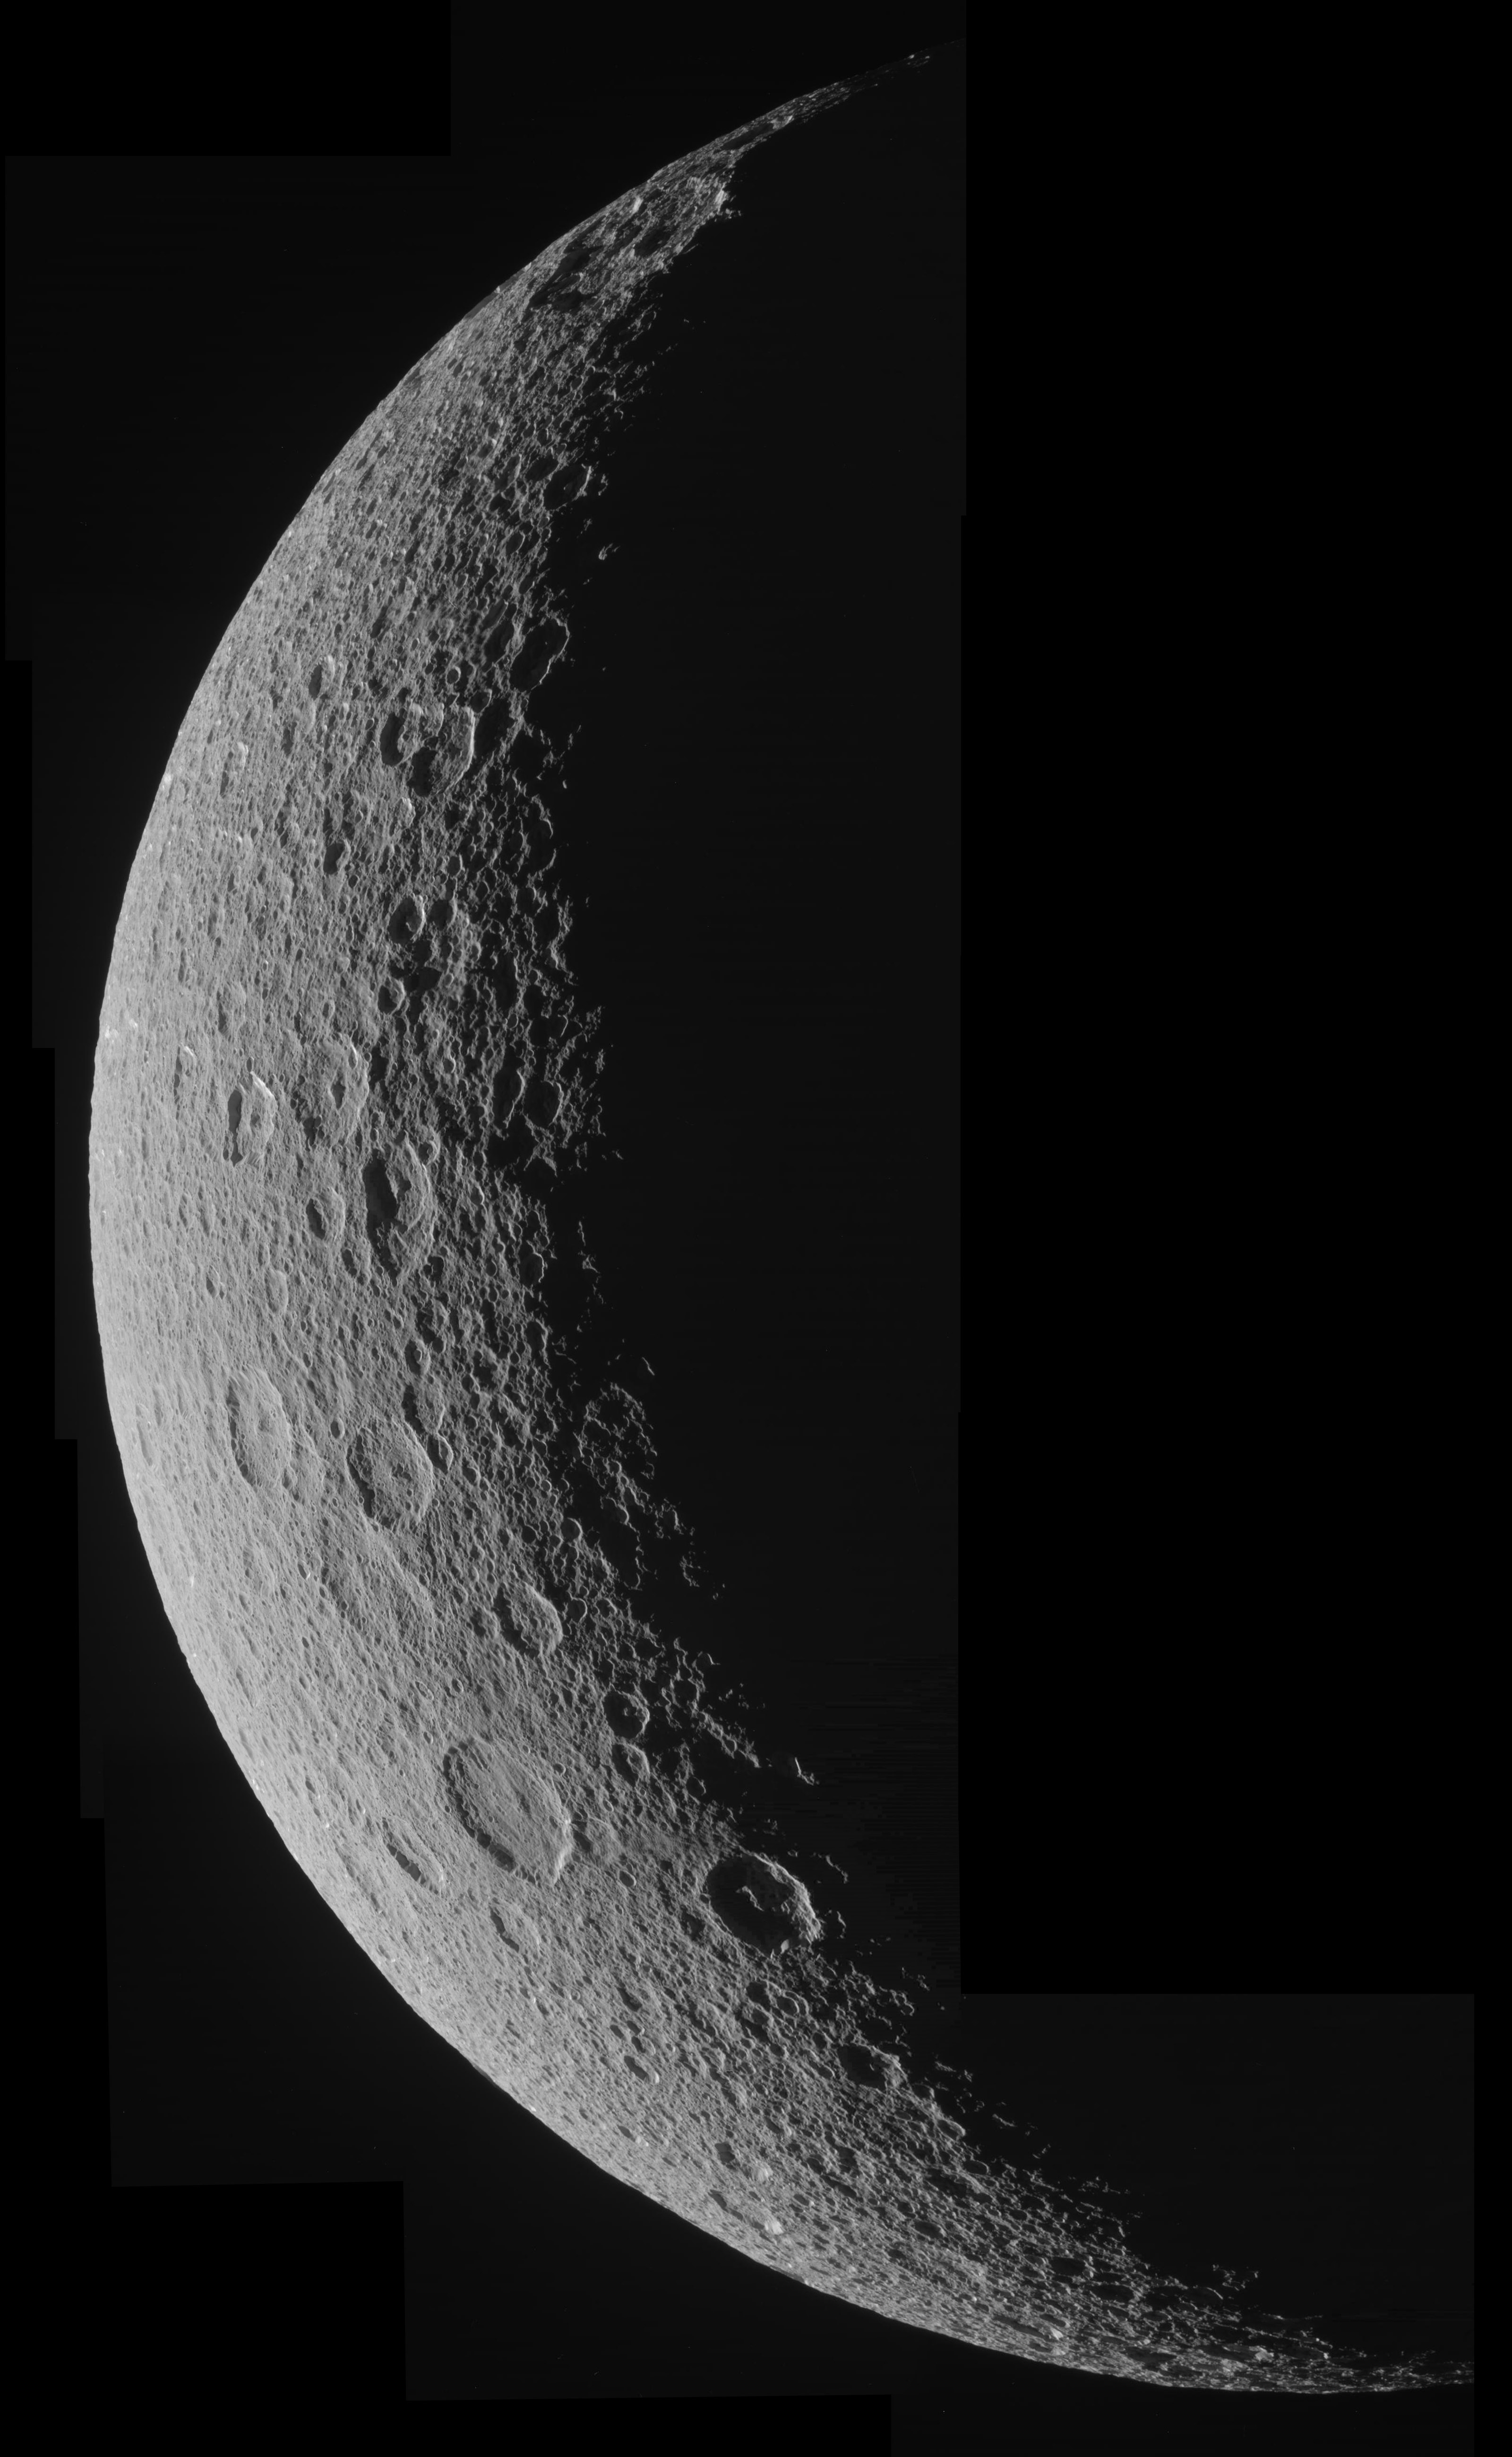
Assembling the Rhea crescent mosaic

Assembling the Rhea crescent mosaic
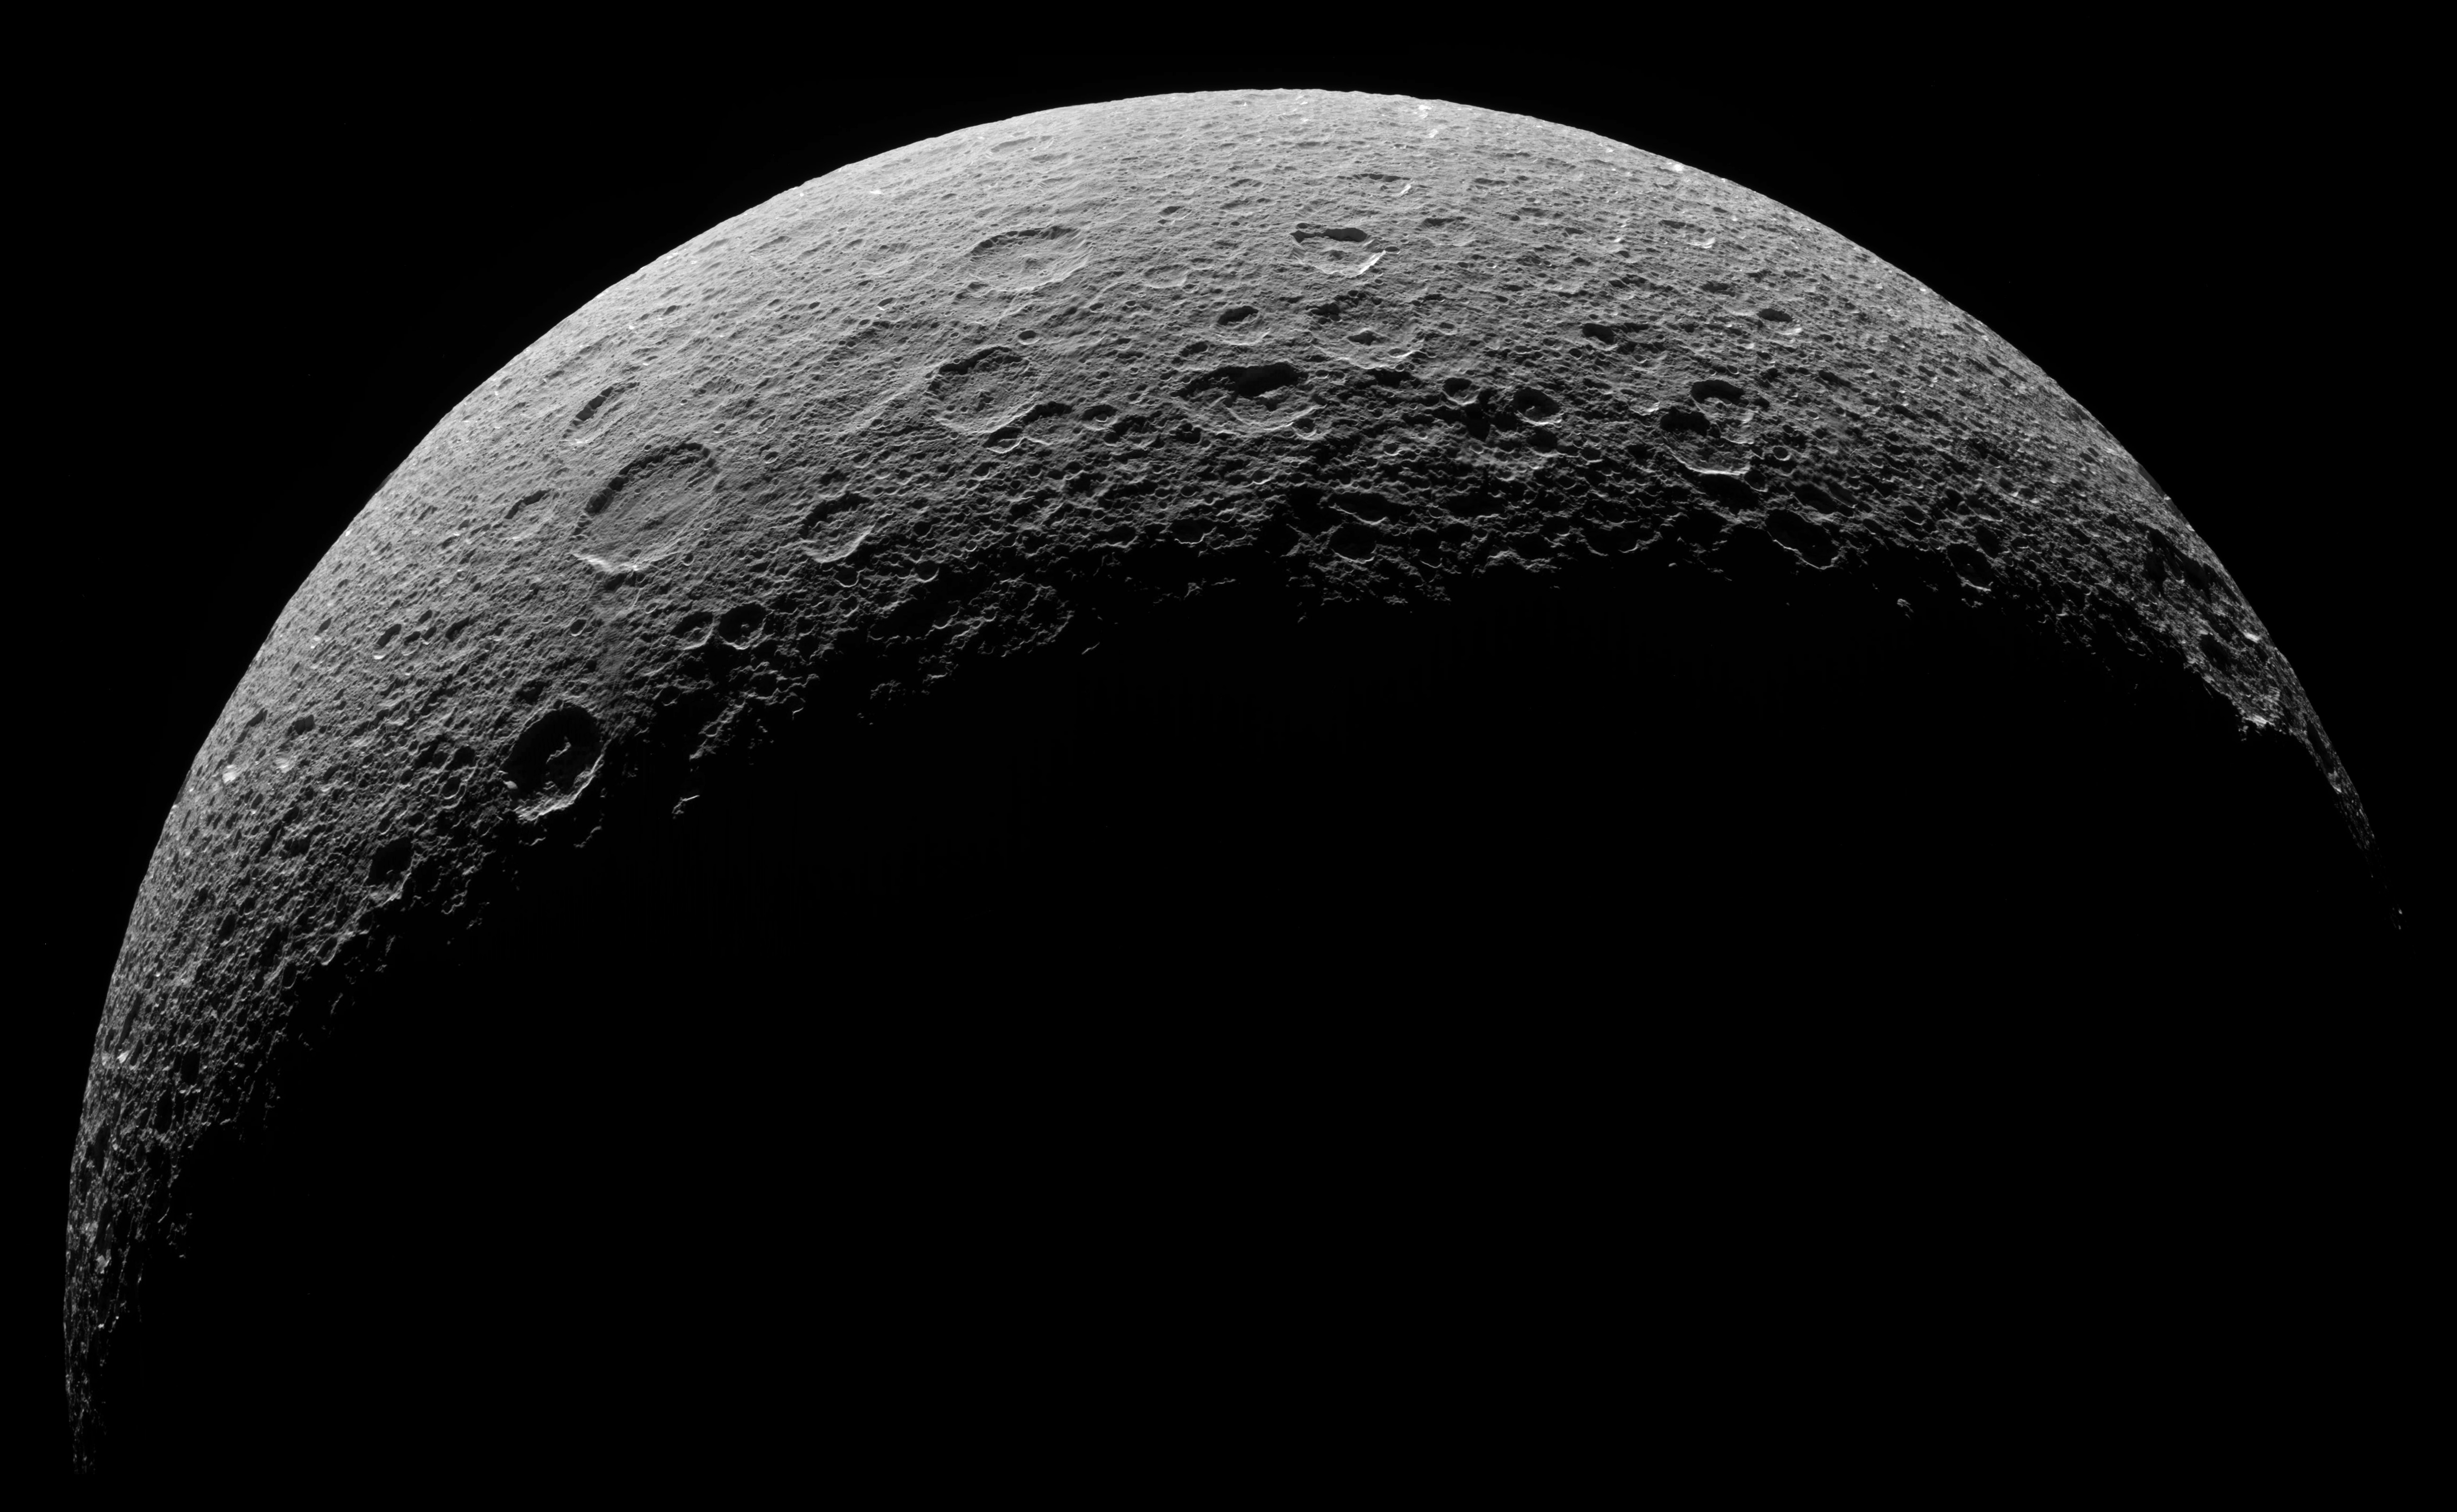
NASA / JPL / SSI / mosaic by Emily Lakdawalla
Crescent Rhea
Cassini took this image of Rhea in a crescent phase on August 30, 2007 from a distance averaging about 60,000 kilometers. There are a total of eleven frames in this mosaic, which was composed of raw images.Protect Our Shared Future
You help us defend humanity and prevent asteroid impacts. Donate now to become a Planetary Defender!
Donate