
 Explore Worlds
 Find Life
 Defend Earth


Sharing an eclipse with kids
Written by
Emily Lakdawalla
January 9, 2024
Solar eclipses are one of the coolest space experiences you can have without leaving Earth. To view them safely, you need solar eclipse glasses. But if you don't have any, you can still enjoy a solar eclipse indirectly.
Making and using pinhole projectors is a fun, easy, and safe way for kids to enjoy a partial or total solar eclipse.
Step 1: Find a good spot
On a day before eclipse day, go outdoors to locate a good viewing spot, at the same time of day that the eclipse will be happening. Look for your shadow — if you can see the shadow of your head and shoulders clearly, whether it's on the ground or on a wall, then you are in a good spot for observing the eclipse. If other shadows are touching the shadow of your head, you don't have a clear view.
Tip: This is a great task to assign to kids. It's fun to observe and identify good and bad spots to see their shadows.

It's also good to be close to a tree that is casting dappled shade. Those shade dapples will look very cool during the eclipse. For best results, find dappled shade falling on a flat surface like pavement, packed dirt, or a wall.

Step 2. Make a pinhole projector (simple or fancy)
For a simple pinhole projector:
Materials:
- 2 index cards (3-by-5 or A6 or A7 size) or small paper plates for each child
- Pushpins (several kids can share)
Procedure:
- Use the push pin to punch a small hole close to the middle of one of the cards. You're done.

For a fancy pinhole projector:
Materials:
- 2 index cards (larger, 5-by-7 or A5 cards work better for this) or small paper plates for each child
- Pencil
- 1 pushpin per child
- Towel, sweatshirt, blanket, flattened corrugated cardboard box, carpet, or other soft substrate to place underneath card during pin pushing (backpacks will work but less well)
Procedure:
- Draw a simple design on a card. The lines should not be too close together. Here are some examples:
- Place the card on top of something soft (blanket, towel, etc)
- Using the push pin, make small holes along your design lines. Not too close together — about 5 milimeters (1/4 inch) apart.


Step 3. Practice using your pinhole projector
Before you go outside, remind your kids: you don't need to look at the Sun. You need to find your shadow!
- Go to your eclipse observing spot and make sure you can see the shadow of your head and shoulders clearly.
- Hold up the card with the hole on top of your shoulder so that you can see the shadow of the card above the shadow of your shoulder.
- Now hold up the other card and make sure you can see its shadow, too.
- Move the second card and watch how its shadow moves. Keeping the card in front of you, move its shadow until the second card's shadow overlaps the first card's shadow.
- Now look at the second card. You should see a dot on the card for every hole you punched. Those dots are actually images of the Sun.
- Move the second card closer and farther away. What happens to the images of the Sun?
- You are now ready to see the shape of the Sun during the eclipse.

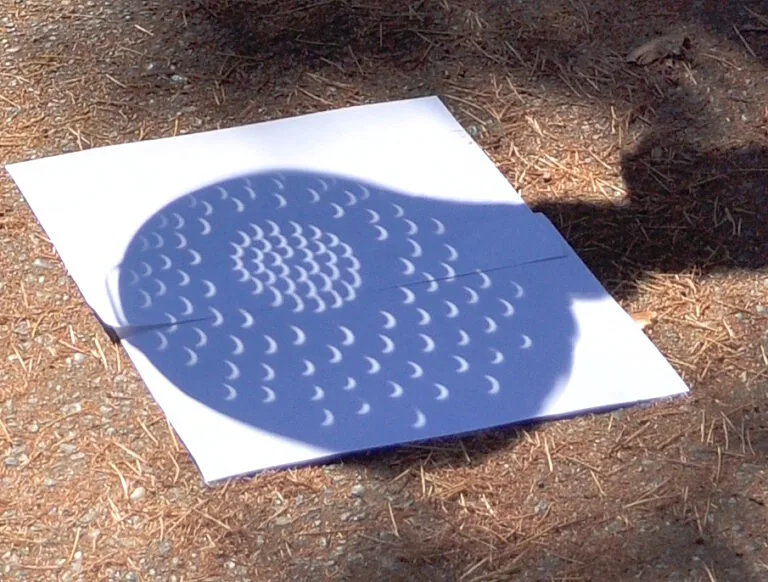
Here's what the fancy eclipse viewers look like:

Step 4: Enjoy the eclipse!
During the solar eclipse, go outside with your kids and do the same things you tried with the pinhole projectors during your practice.
You'll notice that the Sun's light that shines through the hole onto the second card might have a crescent shape instead of being a full circle. This is because part of the Sun is being blocked by the Moon. If you were able to look at the Sun with eclipse glasses, you'd see that shape too. The Sun's shape is projected through the hole on your first card onto the second card. Pretty cool!
You can try the same thing by holding up an ordinary colander (pasta strainer) and looking at its shadow.
Because a total or partial solar eclipse can take several hours to happen, it's good to try the pinhole projectors at different stages. As the Sun gets more and more eclipsed by the Moon, the effect of the experiment will get more and more obvious.
Don't forget to look in the shadows of trees during the eclipse, too! What do you see there?

Editor's note: This article was originally published by Emily Lakdawalla with specifics related to the 2017 total solar eclipse. It was updated by Kate Howells in 2024.
Protect Our Shared Future
You help us defend humanity and prevent asteroid impacts. Donate now to become a Planetary Defender!
Donate