
 Explore Worlds
 Find Life
 Defend Earth


The story behind Curiosity's self-portraits on Mars
Written by
Emily Lakdawalla
August 19, 2015
Whenever Curiosity drills at a new site on Mars, the team tries to take a self-portrait as part of the documentation of the drill site. On sol 1065, Curiosity took its most recent self-portrait -- from a brand-new perspective.

The image is all the more amazing when you see how many individual frames the Mars Hand Lens Imager (MAHLI) had to take in order to cover the 360-degree view:

It's fun. But why this different point of view from previous panoramas? And were there any special challenges in making it? I talked with both the rover driver who headed up the development of the arm sequence (Joseph Carsten) and engineers and scientists who developed the camera (Mike Ravine and Ken Edgett) to learn more about this special self-portrait.
MAHLI is one of four color cameras on Curiosity; the other three, including the Mastcams and Mars Descent Imager or MARDI, were also built at Malin Space Science Systems. (In mission documents they're referred to together as the MMM cameras for MAHLI, Mastcam, and MARDI.) All three cameras have a common detector and focus mechanism, but different optics.
Ravine told me that the story began about a month before Curiosity's launch. In a conversation among three MMM camera team members, including Ravine, Mastcam/MARDI principal investigator Mike Malin, and filmmaker James Cameron, the men realized that MAHLI had the potential to take some of the most evocative photos of the mission. It has a wider-angle view than the Mastcams, but more importantly, it could be pointed back at the rover to image rover hardware on Mars.
Of course, this was not the original intent of MAHLI, and it would take significant effort to pull off. A self-portrait would require dozens of MAHLI photos that would have to be stitched together on the ground. For them to stitch together seamlessly, the camera's detector needed to be held at a fixed position in space, while the optical axis was rotated to point in all the different directions required for all the images. It could be done, but using MAHLI is a lot more complicated than using the Mastcams. The Mastcams sit on a camera bar that points using a pan and tilt mechanism that is comparatively simple to understand; Mastcam image sequences can be developed by Mastcam team members based at Malin Space Science Systems in San Diego. But MAHLI sits on the robotic arm, and only skilled rover drivers -- officially titled "rover planners" or RPs -- at the Jet Propulsion Laboratory can develop robotic arm sequences. In fact, only some rover drivers are qualified to work the arm. So the MMM team had to get the rover drivers on board with the idea.
Ravine says that once he showed the rover drivers that it was possible to take a picture of the rover on Mars from a third-person point of view, "it wasn't that hard to sell." The capability to fix the MAHLI detector's position in XYZ space was technically built in to the arm software already. Rover driver Joseph Carsten began to work on the challenging sequence. Carsten explained his process in an email to me:
Once you've picked where you want the CCD, the next challenge is figuring out how to lay out the frames. There are a few main things to consider:
1) Make sure everything you want to image is covered with adequate overlap between frames.
2) Minimize the total number of frames required (save on duration and data volume).
3) Simplify the sequencing as much as possible to reduce the review burden on the tactical team.
This process is complicated by the fact that not every position and orientation is guaranteed to be reachable. One factor is collisions. There can be collisions between arm and rover hardware. Another factor is kinematic reachability. A desired position may not be kinematically feasible at all, or it may only be reachable in a specific arm configuration. When we run the observation, we actually capture all the frames that are reachable in one shoulder configuration, switch the shoulder configuration (which takes a few minutes), and then take the rest of the frames in that other configuration.
There are other secondary considerations as well. One is lighting. Ideally you don't want shadows to move much between frames so the stitching works well. For that you can play with the time of day for the observation and the ordering of frames (take spatially adjacent frames close together in time so the shadows don't have much time to move). For these mosaics, the shadowing you'd really like to avoid is from the arm. Since the arm moves between each and every frame, the arm shadows move more dramatically than anything else.
The arm also needed to be kept out of the way of all of the photos. The arm has five degrees of freedom (two perpendicular rotational axes at shoulder and wrist, and one hinge-like joint at the elbow) -- and that's one degree of freedom short of the number needed to fix both the position and the orientation of the optical axis in space. So the rectangular MAHLI images couldn't be held parallel to the horizon; the point of view rotates around the optical axis. Images had to be placed carefully to account for their different angles and still ensure enough overlap between adjacent frames for them to assemble neatly. This animation shows the complicated series of movements:
Nothing can ever be done with the robotic arm on Mars unless it has been tried out first on the testbed rover on Earth. If Curiosity was going to shoot self-portraits on Mars, its double would have to shoot a self-portrait on Earth first. But as Curiosity sped toward Mars, the rover drivers were preoccupied with more important things than selfies, such as testing out all the arm sequences that would allow them to do critically important science tasks, like positioning APXS and MAHLI on a rock target, and the terribly complicated process of drilling. There was an awful lot of verification and validation to be done in the time between launch and landing.
Once the rover landed, the engineers would need to use the testbed rover to mirror Curiosity's actual motions on Mars during its initial shakedown, so it would not be available for testing purposes for weeks after landing. Testing in the outdoor Mars Yard would have to end on August 1, 2012 so that the testbed rover could be driven across JPL to the indoor Mars yard for mission shadowing after landing. Ravine told me that as August approached, he figured that the rover drivers wouldn't have time to test out the sequence.
Early in the morning of August 1, Ravine got an email: they had run the test. Ravine pointed out to me that in the image below, you can see the clock on the wall shows 4:30. That's not 4:30 PM, it's 4:30 AM (a fact confirmed to me by Vandi Verma, one of the two engineers in the picture). It was actually the very last thing they did with the testbed rover before they drove it to the indoor Mars yard. They shot the mosaic twice in two slightly different positions, allowing the possibility of a 3D self-portrait.

The team was thrilled with the image and looked forward to running it on Mars. James Cameron predicted that, if successful, it would be printed on every magazine cover. He also pointed out that the image was not yet perfect for a magazine cover, because it couldn't be cropped to a rectangle without truncating the left front wheel, so later on Carsten added more frames to fill in the lower corners. They took the first full self-portrait on Mars on sol 84.

Sol 84 wasn't the first time that MAHLI imaged the rover. Much earlier than the vanity project of the full self-portrait, the rover drivers wanted to use MAHLI for an engineering purpose, to image key parts of Curiosity's hardware to check out how it had survived the landing, like the mast. One of the earliest MAHLI sequences was this "belly pan," checking out the undercarriage of the rover.

The sequence for the belly pan was generated by the rover drivers at JPL without consultation with the MAHLI science team -- ordinary procedure when an image is being taken for engineering purposes. The rover drivers didn't need the images to mosaic together so they didn't go to the additional trouble of holding the camera position constant between images. The images don't fit together neatly; the seams in this mosaic are jarring, and parts are out of focus. But people loved the rover's self-portrait of its wheels on Martian soil.
When Ravine saw the belly pan as a foldout in the a National Geographic article in July 2013, he knew it could be done seamlessly, like the sol 84 self-portrait, and he thought it would be worth the attempt. He suggested it to the team, and just three weeks later, the rover planners ran the sequence in the testbed, validating it for use on Mars. Not only had they captured a seamless belly panorama, they photographed the entire rover from the same point of view.

There are several things that made the lower angle more challenging. In the original self-portrait, the high camera position means that there is zero chance of collision between the arm and terrain. With the belly pan, the rover planners had to keep the turret away from the ground. They know where the ground is with respect to the testbed rover, but they wouldn't know precisely where the ground was on Mars until the rover was parked in the precise spot from which it would shoot the self-portrait. Because the turret doesn't show up in rover self-portraits, it's easy to forget just how enormous it is:

Moreover, focusing the camera presented a challenge, Carsten said:
For the regular selfie we used one focus setting for the whole thing. For this one we had a wider range of distances to objects in the scene (~60cm to some of the workspace out to infinity on the horizon). We ended up using two focus settings - a closer focus for the workspace and a further focus for everything else. Building the commands to implement the activity is an iterative process where you try and satisfy all the above constraints (some of which can be at odds with each other!). The sheer number of imaging positions makes things interesting. As you try and tweak things to solve one problem, you don't want to break everything else that's already working.
The team had to wait two years to find the right spot on Mars to deploy the sequence. They were limited by terrain, in part because of where the mission chooses to take self-portraits: drill sites. For reasons of reachability and viewability, the mission typically selects drill sites that are flat (like at John Klein) or gently sloping upward in front of the rover (like at Garden City) or even on a ledge in front of the rover (like at Windjana). Upward-sloping or outcroppy terrain within the arm's reach -- precisely the terrain the rover planners like for drilling -- is bad for the belly-pan self-portrait, where space is needed in front of the rover for turret motion. Carsten picks up the story:
When I saw where we ended up for the latest drill campaign I suggested that maybe this was the place to finally do [the belly-pan self-portrait]. The rover was in a fairly unusual place, perched right on the edge of the top of a hill. The workspace was sloping away from the rover, which isn't very common (and makes target reachability difficult!). However, it's great for the belly pan because there is extra clearance between the turret and the terrain. We were actually able to get a lower viewing angle than originally planned because of that. Plus there's the amazing sweeping view of the valley in front of the rover and the interesting fairly tall chunk of outcrop just off the starboard side of the rover. For all of those reasons it seemed like a fantastic place to do it, so I'm glad we were able to fit it in before we left!
I am, too! And it's been fun to watch the amateur community try to make the best of it. Since the image is essentially spherical, it's a challenge to represent the result on a two-dimensional screen; many amateurs have grappled with this image, and each has tried their own way of solving the problem.
It can work to crop a small area, but then you miss the expansive view.

You can recognize that all of the ground surface is essentially the bottom half of a sphere, and represent that as a circle; but Curiosity's head balloons.

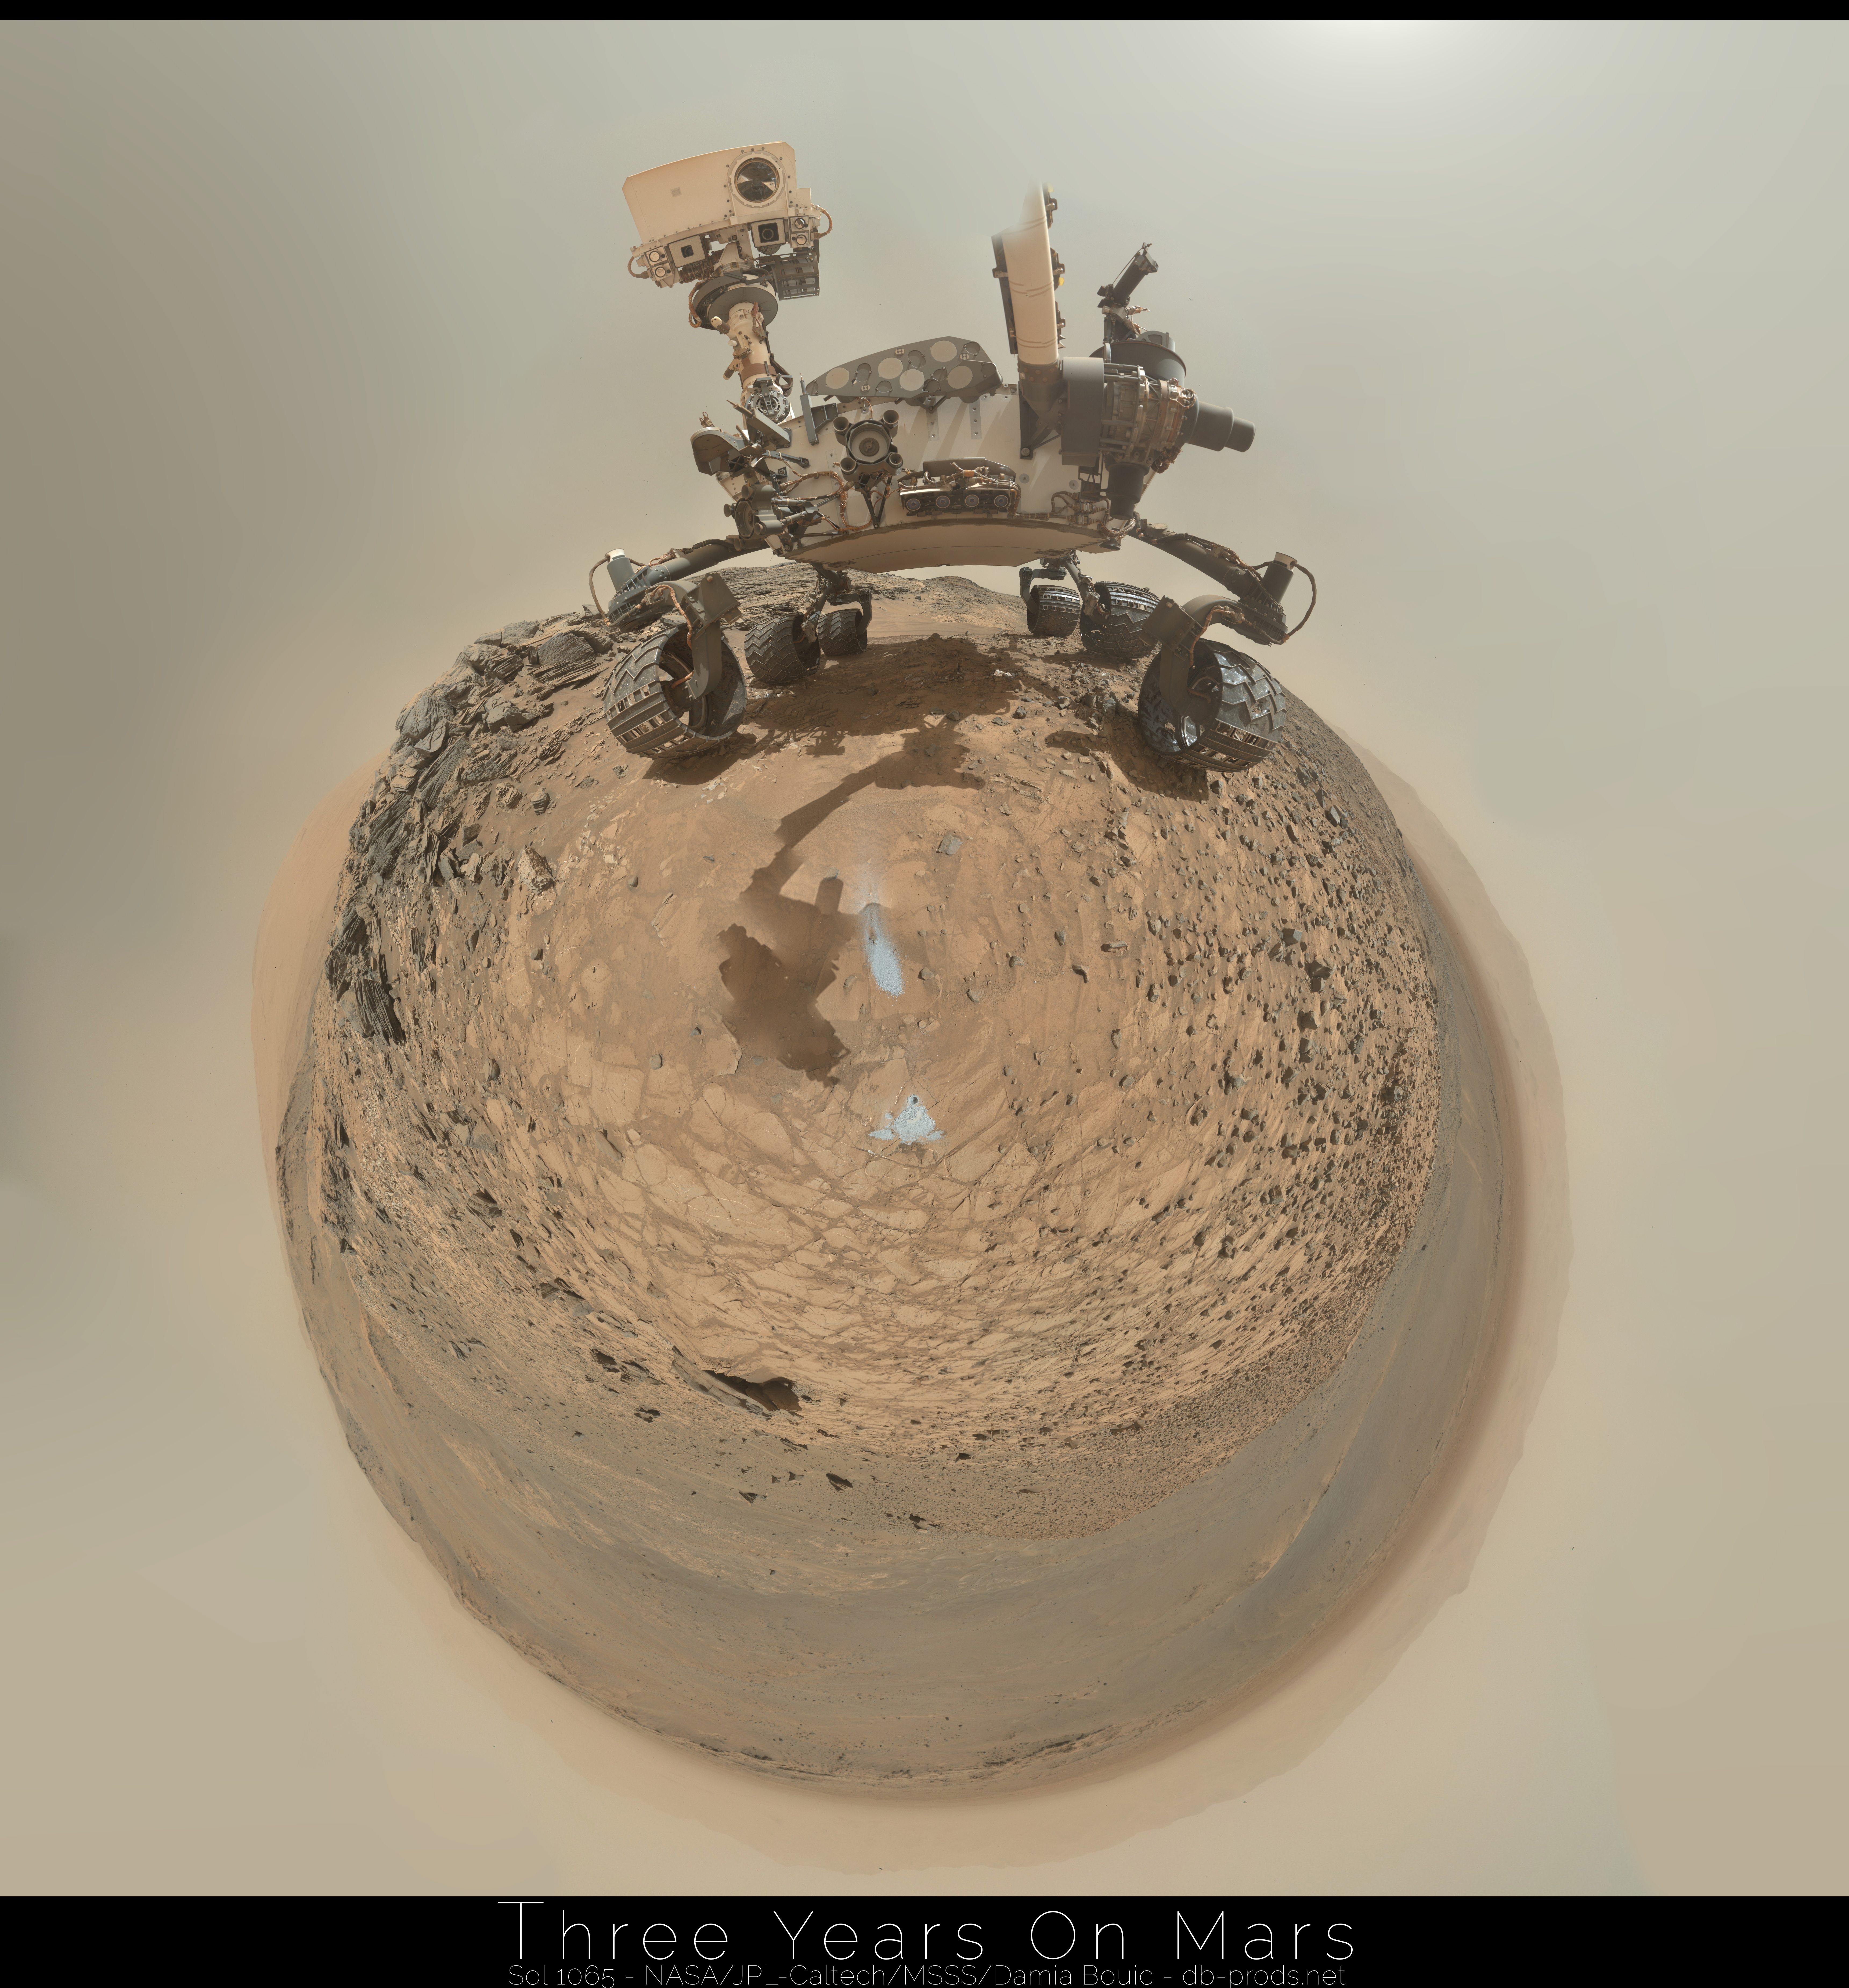
You can accept ballooning in areas of the panorama where scale is less obvious.

You can view it with an application designed for photo spheres.
In the official vision, the projection treats the ground more or less as a sphere, but it's sliced in a way that distorts the rover less at the cost of introducing more distortion in the terrain. It doesn't matter; it's beautiful.
I'm glad for the people on the mission who had the imagination to see the potential for these self-portraits -- and the persistence to pull them off. Thanks to everyone involved!
Protect Our Shared Future
You help us defend humanity and prevent asteroid impacts. Donate now to become a Planetary Defender!
Donate