
 Explore Worlds
 Find Life
 Defend Earth
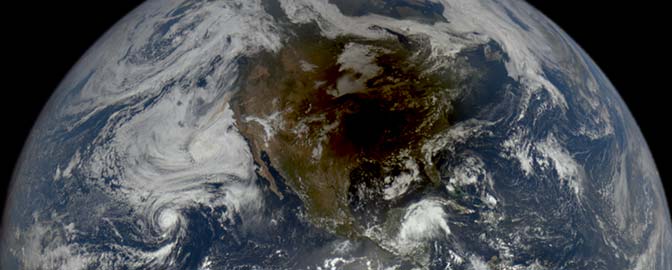


Emily Lakdawalla • Aug 30, 2007
The cave entrance on Arsia Mons really is a pit
The HiRISE camera on Mars Reconnaissance Orbiter has gotten another look at that dark hole on the flank of Arsia Mons. This time, the viewing geometry was different. In the original image, taken in May, HiRISE was looking "nadir," that is, straight down. Absolutely nothing was visible in the blackness of the pit.
NASA / JPL / U. Arizona
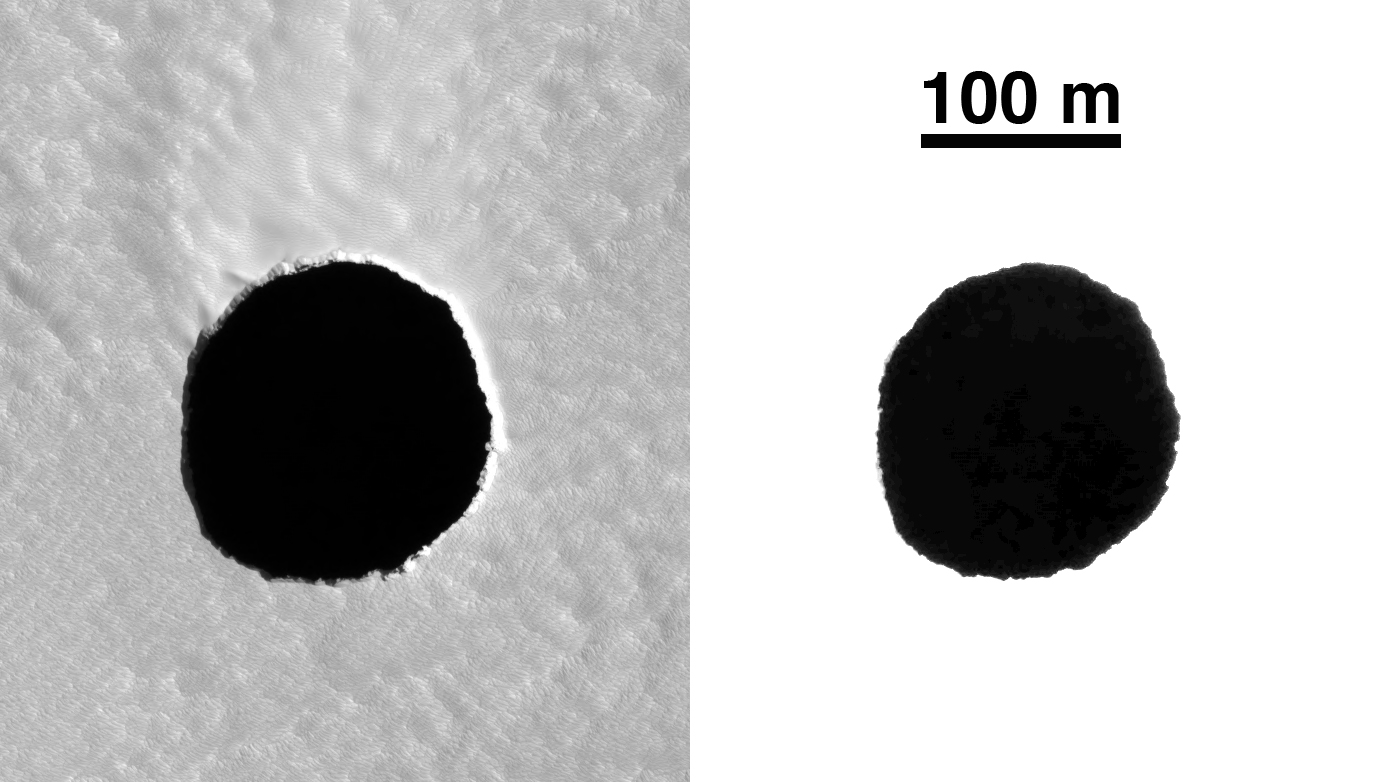
Cave entrance on the flank of Arsia Mons
At its highest resolution of 25 centimeters per pixel, the HiRISE camera can see the detailed shape of the slightly scalloped edge of a hole on the flank of Mars' Arsia Mons (left), but no amount of image enhancement (right) can bring out any further details inside the hole. That means that the walls of the cave are overhanging -- the cave is larger below the ground than the entrance we can see at the surface -- and that it is very deep. Mars' dusty atmosphere produces enough scattered light that "skylight" would illuminate the floor of a shallow cavern well enough for HiRISE to detect it.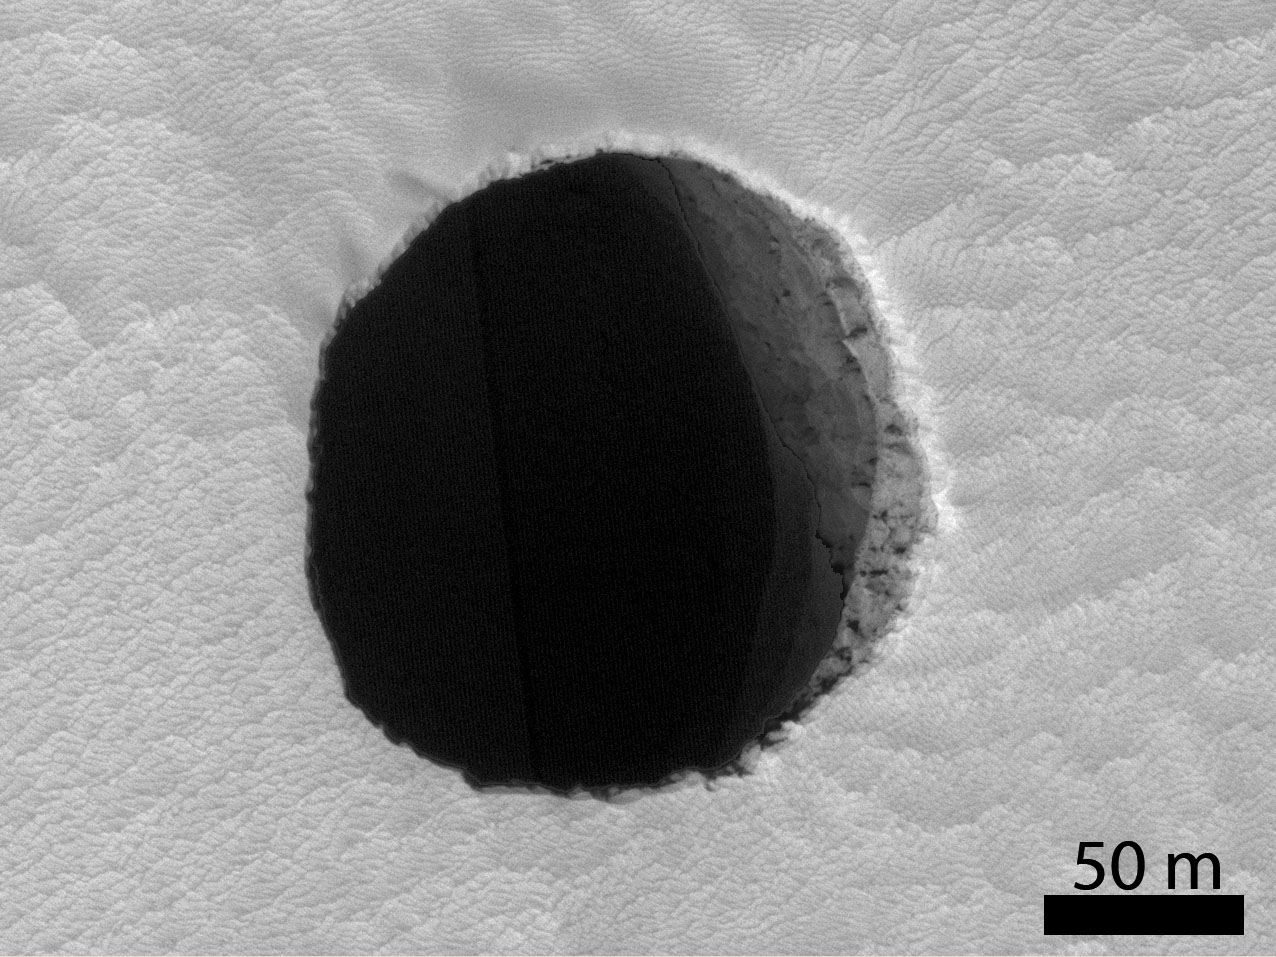
NASA / JPL / U. Arizona
Cave entrance on the flank of Arsia Mons
In this HiRISE image captured on August 8, 2007, a black spot mars the flank of Arsia Mons. The spot is most likely a skylight onto a subterranean cavern. The cave was previously seen by HiRISE (on May 7, 2007) from nearly overhead, and the interior of the hole revealed nothing. In this image, HiRISE was looking at the cave entrance from the west, so can see the eastern wall of the pit before it vanishes into blackness. Near-vertical striping on the image is an artifact of image processing. The brightness and contrast of this image has been adjusted to bring out more details on both the dune-covered surface and the eastern wall of the pit.To explain what I'm talking about, consider this image below. This image is 40 pixels on a side and consists of a circle made of only 100% white pixels drawn on a 100% black background.

Now let's take that circle and save it with JPEG compression, and here's what you get.

It looks pretty much the same as before. But let's play with the brightness and contrast and see what the JPEG compression did to the image. The left image shows what's happened to the pixels at the dark end of the scale, and the right image shows what's happened to the pixels at the bright end of the scale.


All of those pixels started out life as completely black or completely white, but the JPEG compression scheme altered their values slightly. It wasn't too obvious in the image though until I started monkeying with the brightness and contrast. However, it becomes much more obvious if you begin with an image that has already been saved with JPEG compression, monkey with it, and then save it again with JPEG compression. It's kind of like making a photocopy of a photocopy; over time, the errors start to build up, and you move farther and farther away from what the original image looked like. The image below has been re-compressed five times, simulating five times that it might have been opened, worked on, saved, and closed in an image processing program.

And here's what that picture looks like if you monkey with the brightness and contrast. I adjusted these images by exactly the same amount as I adjusted the once-compressed image above, so you can see how much more the image has changed after being re-re-re-re-compressed. These features in the image, introduced through processing, are one type of "artifact" that can make it difficult to interpret space images.


The lesson is, it's dangerous to attempt to draw conclusions based on what you might see in an image when you try to reveal details hidden in highlights or shadows. It is safer to begin with the original data from the Planetary Data System. However, even these images are not completely safe; spacecraft operators often compress images on board the spacecraft before returning them to Earth to save on bandwidth, so the original data may contain similar artifacts to the ones shown here. The effect is particularly pronounced when spacecraft need to take lots of images and send them back to Earth really fast. Some of the worst artifacts I've seen in original image data were on the Huygens spacecraft, which had to funnel all of its data through a tiny transmitter and do it in real-time; there was no way to return lots of images without compressing the heck out of them.
You can avoid introducing compression artifacts into your own images by saving them on your computer in formats other than JPEG. JPEG is a "lossy" compression scheme that shrinks file sizes at the expense of introducing artifacts such as these. Consider working with your images in PNG format, which compresses images somewhat (not as effectively as JPEG) but does not introduce artifacts.
And please, avoid trying to draw scientific conclusions from images that you have taken from the Internet and stretched hugely to reveal details hidden in highlights and shadows. For the most part, those details are probably not real!
Let’s Go Beyond The Horizon
Every success in space exploration is the result of the community of space enthusiasts, like you, who believe it is important. You can help usher in the next great era of space exploration with your gift today.
Donate Today